
# Integration with Salesforce
# Introduction
In this tutorial we will integrate Salesforce, a customer relationship management (CRM) platform, with Modyo's Customers module where the platform's end users are managed. This integration allows us to manage all users from one place and thus centralize the workflow of our sales, marketing, and organization teams.
# Prerequisites
- A Modyo platform account with Administrator permissions
# Step 1: Initial Setup
The first thing we need to do is log into our Salesforce account, where we'll set up the integration with Modyo Platform.
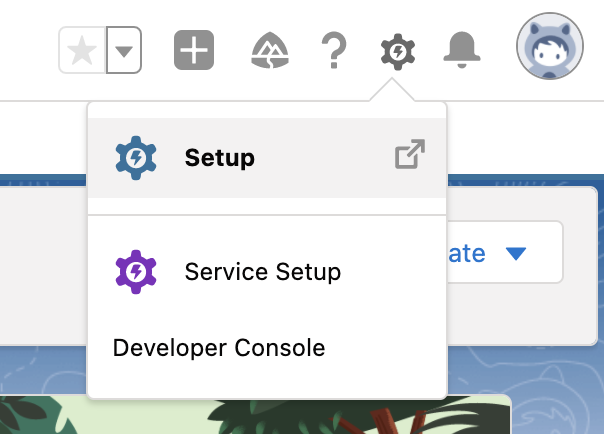
Once we log into our account, click Setup.
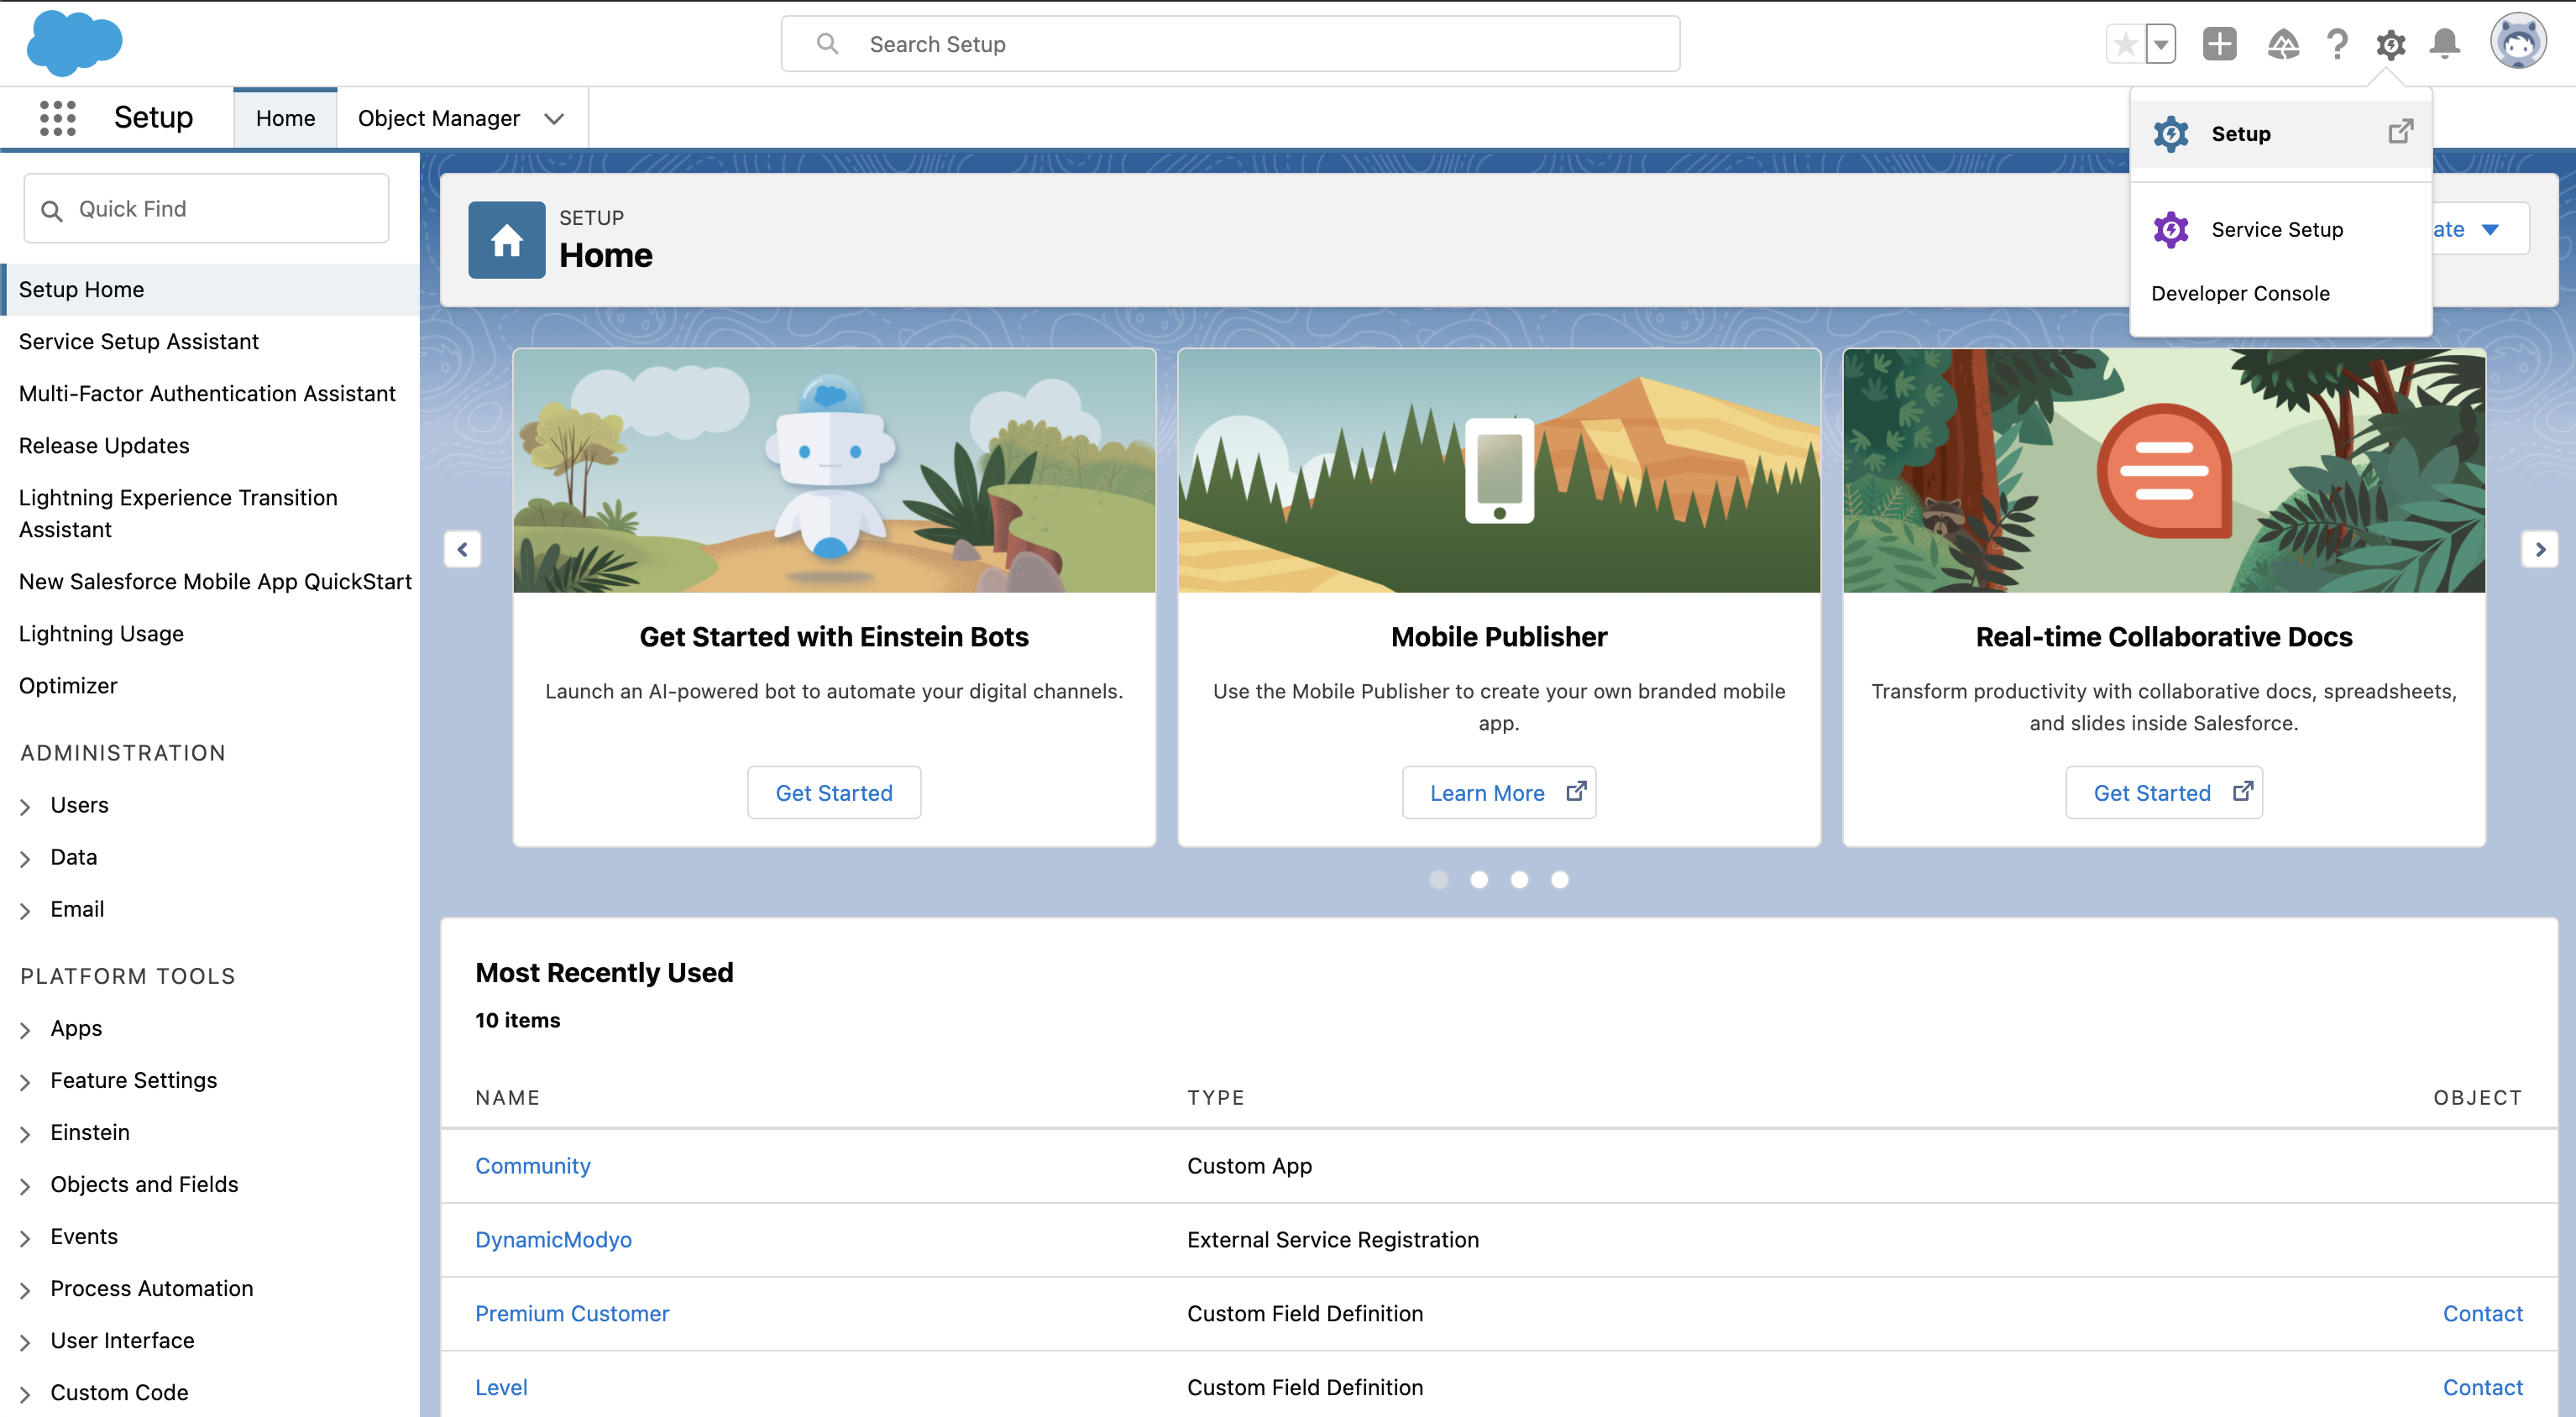
The link to Setup is located in the upper right corner of our screen, and its icon is a gear:
# Step 2: Apex Class
The first thing we have to do inside the Setup is in the search engine type Apex Classes to go and generate a new Apex Class, which will be used to create the Authentication Provider.
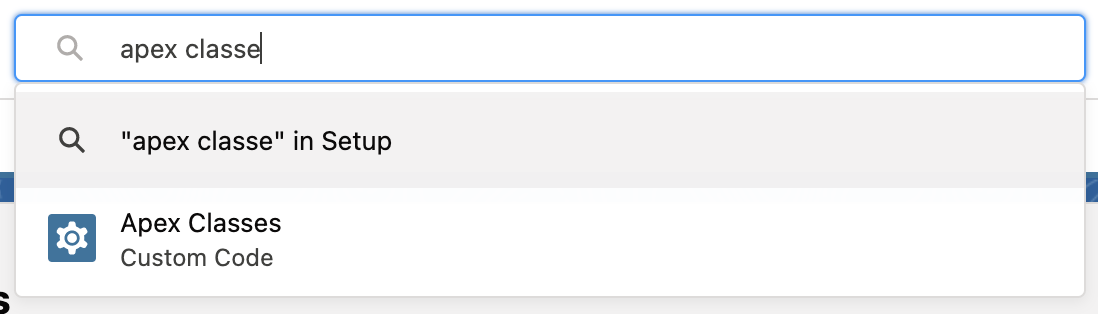
The Apex class contains the different rules and processes needed to authenticate a user with the custom authentication provider.
To create a new user authentication, click New and paste the following code into the Apex class editor.
global class Modyo_Connector extends Auth.AuthProviderPluginClass {
          // Use this URL for the endpoint that the
          // authentication provider calls back to for configuration.
          public String redirectUrl;
          private String key;
          private String secret;
          // Application redirection to the Modyo_Connector website for
          // authentication and authorization.
          private String authUrl;
          // URI to get the new access token from Modyo using the GET verb.
          private String accessToken;
          // Api name for the custom metadata type created for this auth provider.
          private String customMetadataTypeApiName;
          // Api URL to access the user in Modyo
          private String userAPIUrl;
          private String userLoginUrl;
          // Version of the user api URL to access data from Modyo
          private String userAPIVersionUrl;
          global String getCustomMetadataType() {
              return 'OAuth_provider__mdt';
          }
          global PageReference initiate(Map<string,string>
            authProviderConfiguration, String stateToPropagate)
            {
                authUrl = authProviderConfiguration.get('Auth_Url__c');
                key = authProviderConfiguration.get('Key__c');
                redirectUrl = authProviderConfiguration.get('Redirect_Url__c');
                // Here the developer can build up a request of some sort.
                // Ultimately, they return a URL where we will redirect the user.
                String url = authUrl + '?response_type=code&client_id='+ key +'&scope=&redirect_uri='+ redirectUrl + '&state=' + stateToPropagate;
                return new PageReference(url);
            }
            global Auth.AuthProviderTokenResponse handleCallback(Map<string,string>
            authProviderConfiguration, Auth.AuthProviderCallbackState state )
            {
                // Here, the developer will get the callback with actual protocol.
                // Their responsibility is to return a new object called
                // AuthProviderTokenResponse.
                // This will contain an optional accessToken and refreshToken
                key = authProviderConfiguration.get('Key__c');
                secret = authProviderConfiguration.get('Secret__c');
                accessToken = authProviderConfiguration.get('Access_Token__c');
                Map<String,String> queryParams = state.queryParameters;
                String code = queryParams.get('code');
                String sfdcState = queryParams.get('state');
                return new Auth.AuthProviderTokenResponse('Modyo_Connector', accessToken,
                'refreshToken', sfdcState);
            }
            global Auth.UserData getUserInfo(Map<string,string>
            authProviderConfiguration,
            Auth.AuthProviderTokenResponse response)
            {
                //Here the developer is responsible for constructing an
                //Auth.UserData object

                String token = response.oauthToken;
                userAPIUrl = authProviderConfiguration.get('API_User_Url__c');
                userLoginUrl = authProviderConfiguration.get('API_Login_Url__c');

                // Create HTTP request to send.
                HttpRequest request = new HttpRequest();
                // Set authorization header
                request.setHeader('Authorization', 'Bearer ' + token);
                // Set the endpoint URL.
                request.setEndPoint(userAPIUrl);
                // Set the HTTP verb to GET.
                request.setMethod('GET');
                // Send the HTTP request and get the response.
                // The response is in JSON format.

                Http httpProtocol = new Http();
                HttpResponse res = httpProtocol.send(request);
                String responseBody = res.getBody();
                System.debug(responseBody);
                String locale = 'en-us';
                String userId = getValueFromResponse(responseBody, 'id');
                String fullName = getValueFromResponse(responseBody, 'name');
                String firstName = getValueFromResponse(responseBody, 'first_name');
                String lastName = getValueFromResponse(responseBody, 'last_name');
                String uname = getValueFromResponse(responseBody, 'email');
                return new Auth.UserData(
                    userId,
                    firstName,
                    lastName,
                    fullName,
                    uname,
                    null,
                    uname,
                    locale,
                    'Modyo',
                    userLoginUrl,
                    null
                  );
            }
            private String getValueFromResponse(String response,
            String json_key)
            {
                Map<String, Object> result = (Map<String, Object>)JSON.deserializeUntyped(response);
                String ret = String.valueof(result.get(json_key));
            return ret;
            }
        }
Click Save.
# Step 3: Custom Metadata Types
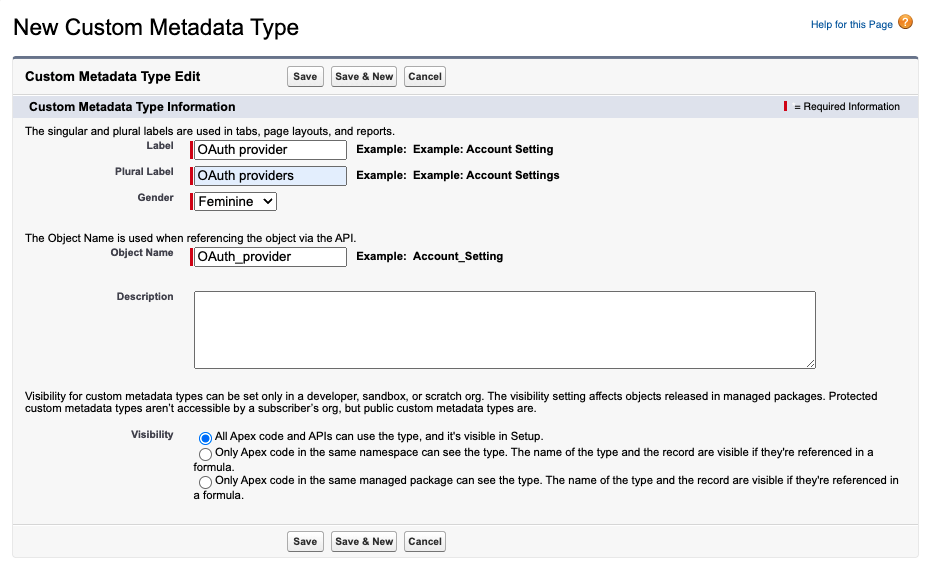
The purpose of Custom Metadata Types is to define which fields we should collect for authentication.
Within these fields, we will have the default fields in Modyo authentication such as Access Token, Key, Secret, among others.
To configure the fields search for Custom Metadata Types and click New Custom Metadata Type.
Click Save and on the settings of Custom Metadata Types , fill in the Custom Fields table with the following:
| Field Label | Data Type |
| Access_Token | Text(255) |
| API_User_Url | Text(255) |
| Auth_Url | Text(255) |
| Key | Text(255) |
| Redirect_Url | Text(255) |
| Secret | Text(255) |
| API_Login_Url | Text(255) |
# Step 4: Authentication Providers
Once the Apex Class configuration and Custom Metadata Types are ready, you need to generate an authentication provider, which will use the newly defined Apex class.
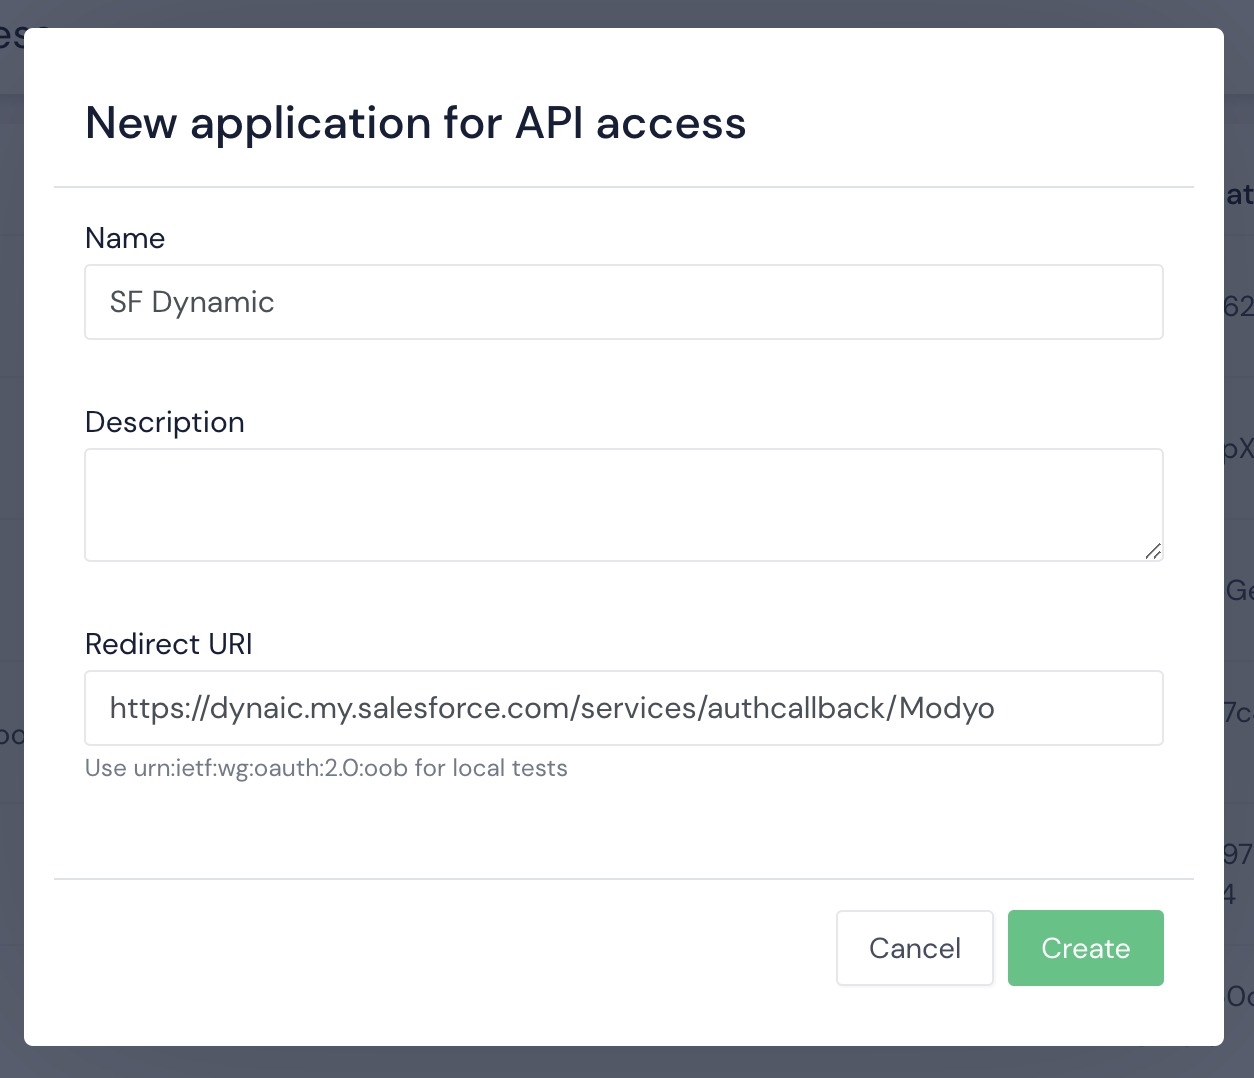
In order to generate an authenticator, from the Modyo platform, within Configuration, click on Access to the API . Generate a new API access in the button on the right above and fill in the fields as follows, where the Callback URL is our Salesforce URL by adding services/AuthCallback/Modyo
Then, in Settings, Team, click your username. In the section of API access click + New Access Token and create one with the one we already configured SF Dynamic to have an Access Token for your user.
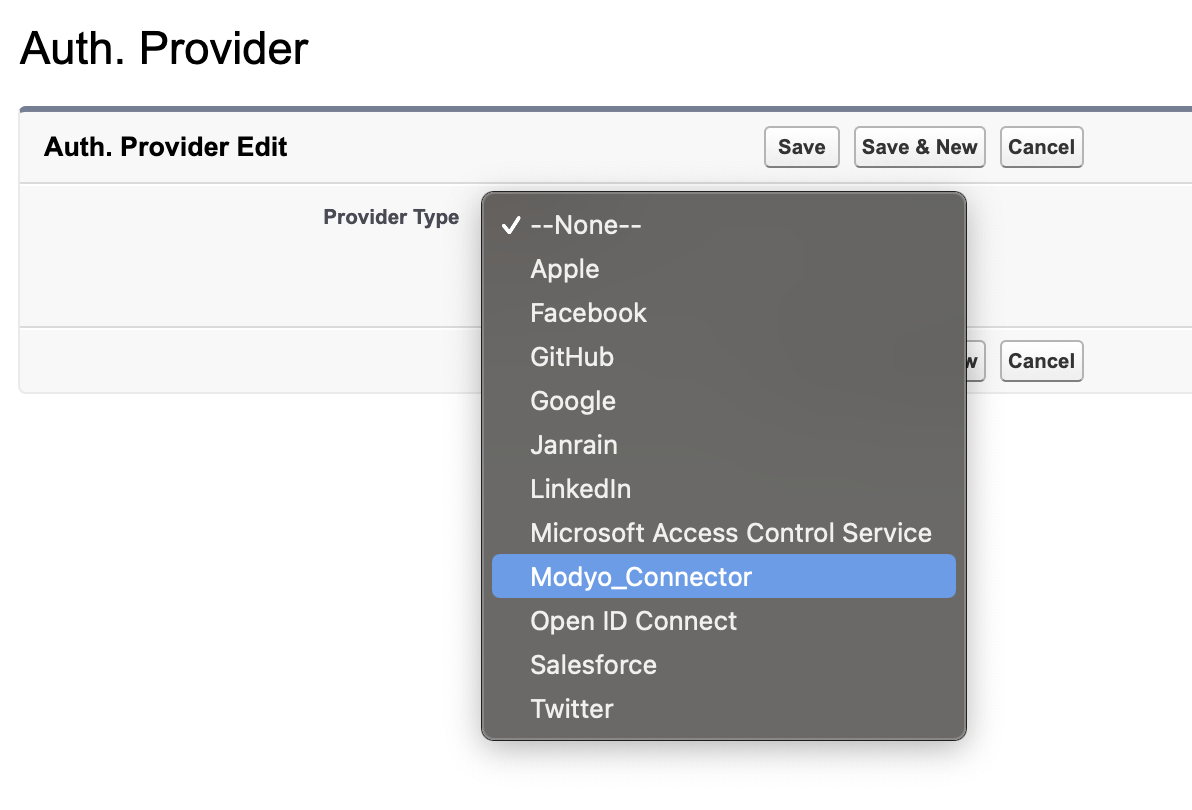
After we have the configuration in Modyo, we return to Salesforce. Within Setup, go to the Auth section. Providers.
To create a new one, click New and within the list we select Modyo_Connector.
Fill in the following data:
| Name | Modyo |
| URL Suffix | Modyo |
| Access_Token | [ Team - API access ] |
| API_User_Url | [ Modyo Account ]/api/admin/admin_users/me |
| Auth_Url | [ Modyo Account ]/admin/oauth/authorize |
| Key | [ API access - Application Id ] |
| Redirect_Url | [ API access - Callback URL ] |
| Secret | [ API access - Callback URL ] |
| API_Login_Url | [ Modyo Account ]/admin/login |
| Registration Handler | AutocreatedRegHandler1626881065042 |
| Execute As | [ Modyo User ] |
# Step 5: Named Credentials
Named Credentials allow users to authenticate to an external service provider. There are several default options, in order to connect to Modyo, we need to create a custom authentication.
To generate one, we are going to search for Named Credentials inside Setup, and click on New Named Credential. We fill in the fields as follows:
| Label | Modyo |
| Name | Modyo |
| URL | [account.url]/api/admin |
| Identity Type | Named Pricipal |
| Authentication Protocol | OAith 2.0 |
| Authentication Provider | [ The one we created ] |
| Generate Authorization Header | Check |
| Allow Merge Fields in HTTP Header | Check |
| Allow Merge Fields in HTTP Body | Check |
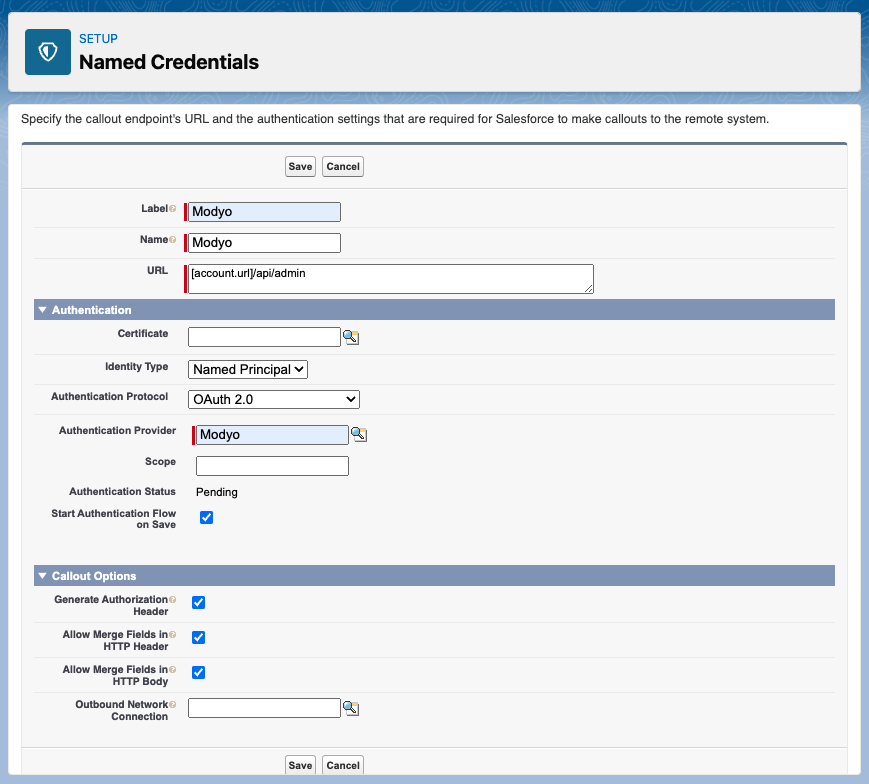
Click on Save .
# Step 6: Remote Site
The last step is the definition of the external service within Salesforce.
External services allow us to connect Salesforce to third-party services, sharing an API schema in OpenAPI format and we find them in Setup -> External services.
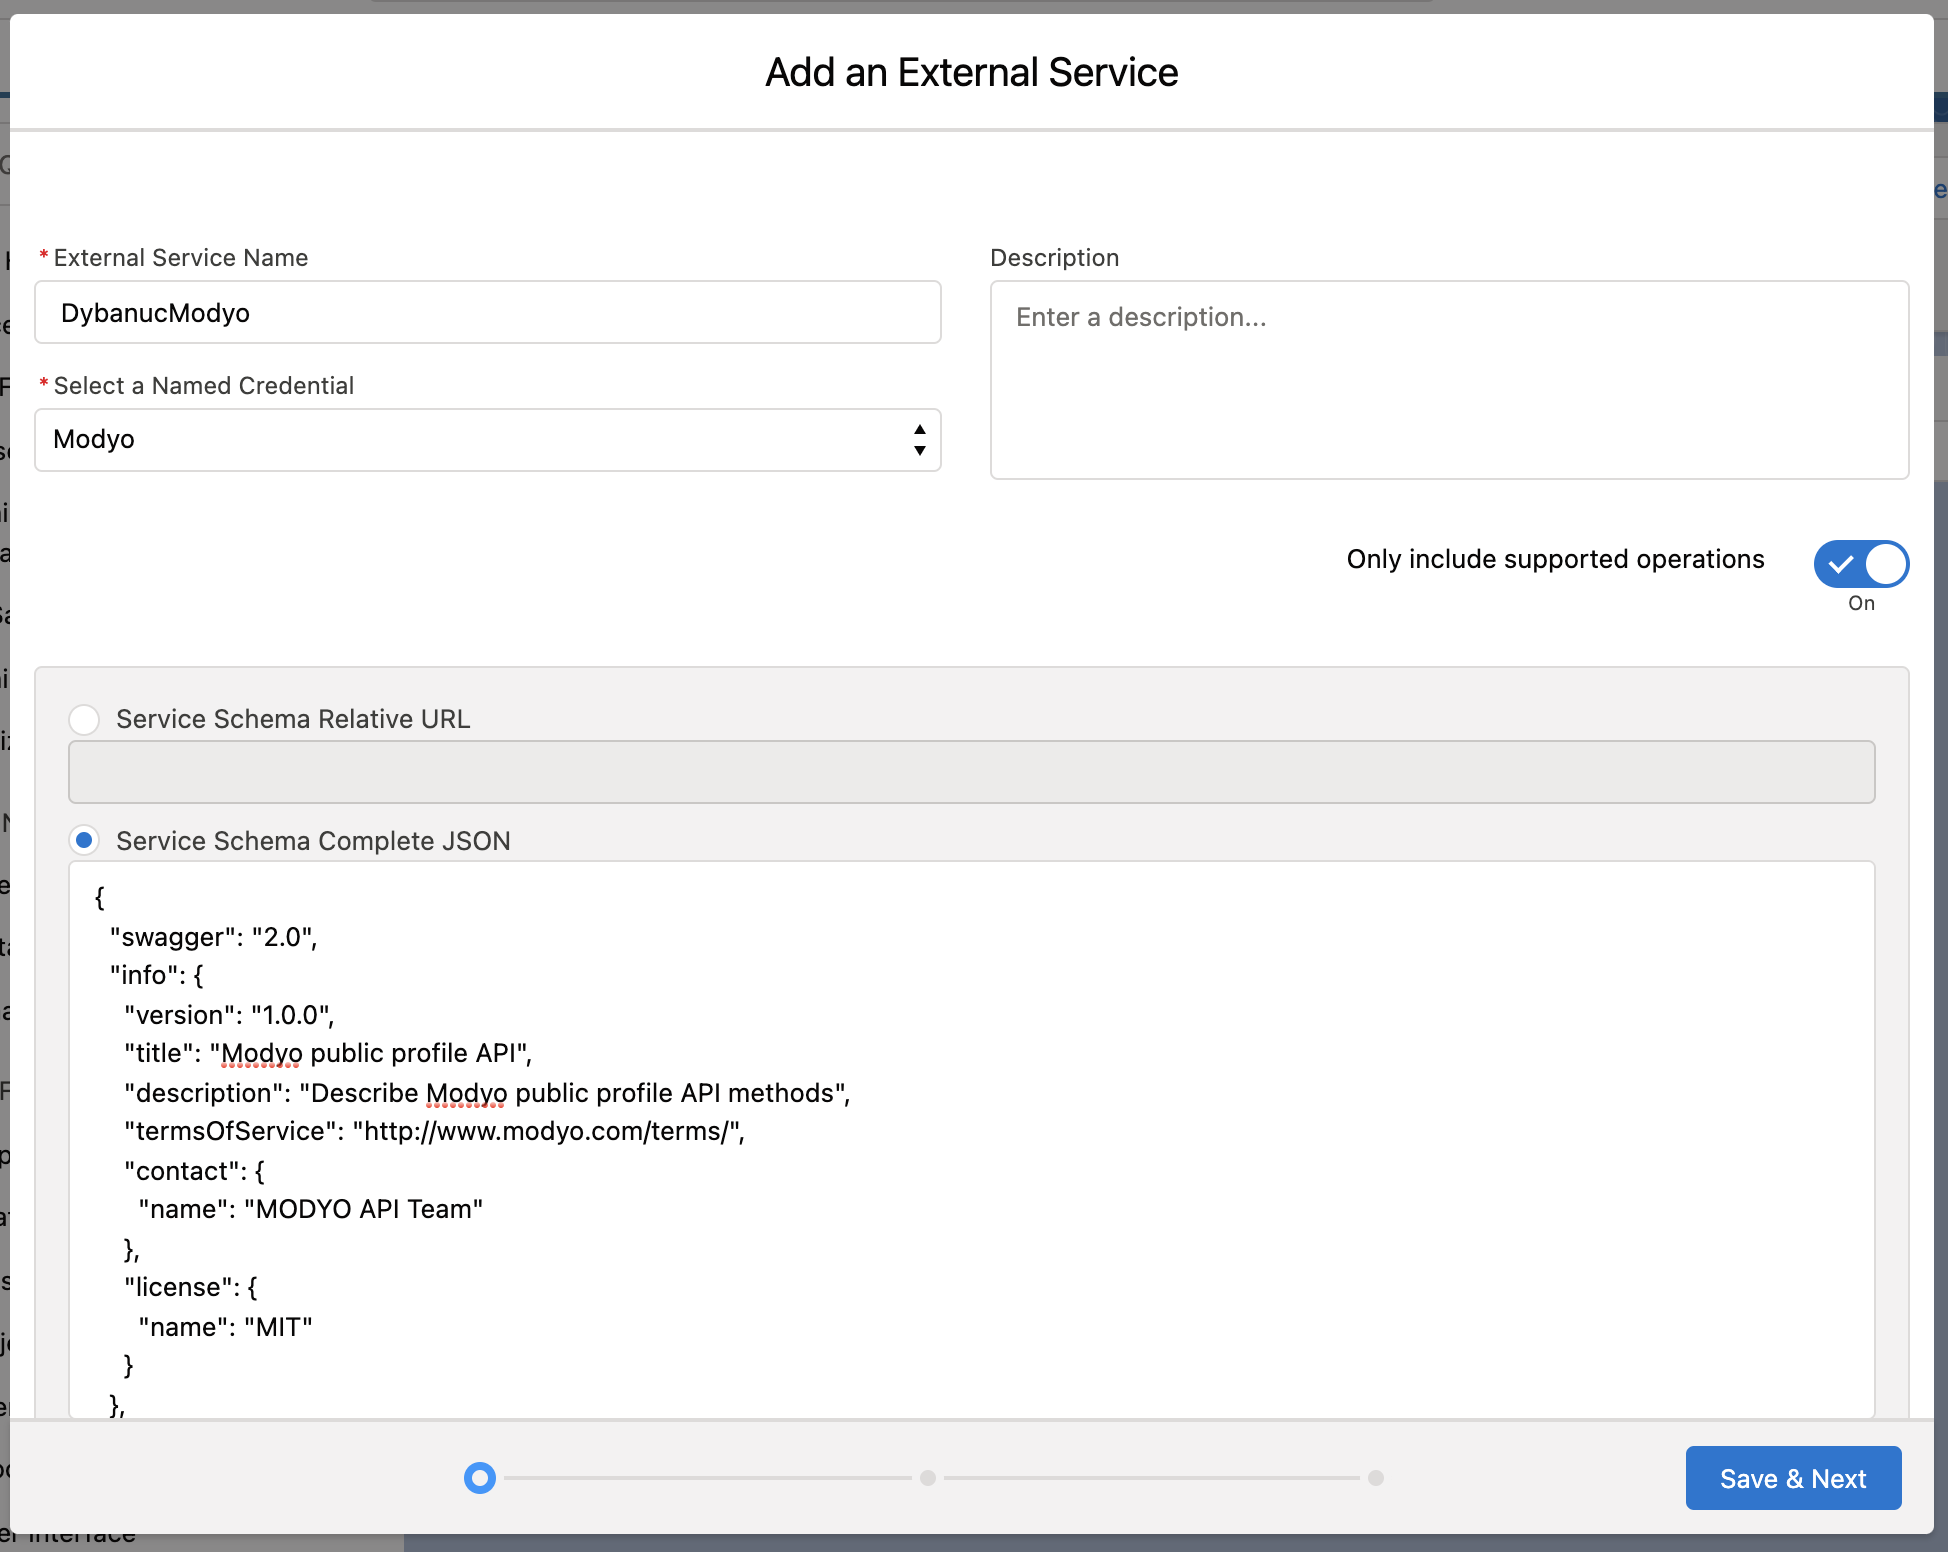
To generate the integration, create a new External Service by clicking on the New External Service button on the top right of the screen.
Enter a name, select the Named Credential you created and at the bottom we paste the following code, selecting Service Schema Complete JSON
{
  "swagger": "2.0",
  "info": {
    "version": "1.0.0",
    "title": "Modyo Admin API",
    "description": "Describe Modyo Admin API methods",
    "termsOfService": "http://www.modyo.com/terms/",
    "contact": {
      "name": "MODYO API Team"
    },
    "license": {
      "name": "MIT"
    }
  },
  "securityDefinitions": {
    "access_token": {
      "type": "apiKey",
      "in": "header",
      "name": "Authorization"
    }
  },
  "security": [{
    "access_token": []
  }],
  "basePath": "/",
  "consumes": [
    "application/json"
  ],
  "produces": [
    "application/json; charset=utf-8"
  ],
  "paths": {
    "/account": {
      "put": {
        "summary": "Update an Account",
        "tags": [
          "Accounts"
        ],
        "parameters": [{
          "name": "account",
          "in": "body",
          "required": true,
          "schema": {
            "$ref": "#/definitions/AccountInput"
          }
        }],
        "responses": {
          "200": {
            "description": "Successful updated",
            "schema": {
              "$ref": "#/definitions/Account"
            }
          },
          "409": {
            "description": "Conflict"
          }
        }
      }
    }
  },
  "definitions": {
    "AccountInput": {
      "properties": {
        "favicon_id": {
          "type": "integer",
          "description": "Favicon ID"
        },
        "dismiss_home_steps": {
          "type": "boolean"
        },
        "logo_id": {
          "type": "integer",
          "description": "Logo ID"
        },
        "cors_enabled": {
          "type": "boolean"
        },
        "cors_allow_all": {
          "type": "boolean"
        },
        "cors_allowed_origins": {
          "type": "string",
          "description": "By default, site custom domains are included once CORS is enabled. To grant external domains access, input them in a comma-separated list. Wildcards are not allowed.",
          "example": "http://sub.mydomain.com, http://spa.mydomain.com"
        },
        "delivery_token_expiration": {
          "type": "integer"
        },
        "name": {
          "type": "string"
        },
        "time_zone": {
          "type": "string"
        },
        "host": {
          "type": "string"
        },
        "default_site_id": {
          "type": "integer"
        },
        "default_site_permanent_redirect": {
          "type": "boolean"
        },
        "robots_enabled": {
          "type": "boolean"
        },
        "sitemap_enabled": {
          "type": "boolean"
        },
        "google_key": {
          "type": "string"
        },
        "lang": {
          "type": "string"
        },
        "min_length_value": {
          "type": "integer",
          "example": 8,
          "minimum": 8,
          "maximum": 128
        },
        "require_lowercase_enabled": {
          "type": "boolean"
        },
        "require_uppercase_enabled": {
          "type": "boolean"
        },
        "require_symbols_enabled": {
          "type": "boolean"
        },
        "expire_after": {
          "type": "integer",
          "example": 300,
          "enum": [
            300,
            600,
            900,
            1200,
            1500,
            1800,
            2700,
            3600,
            5400,
            7200,
            14400,
            28800,
            57600,
            86400,
            172800,
            259200,
            345600,
            432000,
            518400,
            604800,
            1209600
          ],
          "description": "Time in minutes"
        },
        "otp_required": {
          "type": "boolean",
          "example": false
        }
      }
    },
    "Account": {
      "properties": {
        "id": {
          "type": "integer",
          "example": 1
        },
        "name": {
          "type": "string",
          "example": "Modyo Cloud"
        },
        "host": {
          "type": "string",
          "example": "company"
        },
        "time_zone": {
          "type": "string",
          "example": "Santiago"
        },
        "lang": {
          "type": "string",
          "example": "en"
        },
        "uuid": {
          "type": "string",
          "example": "a24f87bd-3abd-4b9d-973e-3e4e9676c345"
        },
        "google_key": {
          "type": "string",
          "example": "AIzaSyDmuYmbFpzTdIxHy"
        },
        "options": {
          "type": "string"
        },
        "cors_allowed_origins": {
          "type": "string",
          "example": "http://sub.mydomain.com, http://spa.mydomain.com"
        },
        "delivery_token_private_key": {
          "type": "string",
          "description": "Delivery token private key as hexdigest"
        },
        "close_scheduled": {
          "type": "boolean",
          "example": true,
          "enum": [
            false,
            true
          ]
        },
        "cors_enabled": {
          "type": "boolean",
          "example": true,
          "enum": [
            false,
            true
          ]
        },
        "cors_allow_all": {
          "type": "boolean",
          "example": true,
          "enum": [
            false,
            true
          ]
        },
        "owner_id": {
          "type": "integer",
          "example": 1
        },
        "status": {
          "type": "integer",
          "example": 1
        },
        "subscription_id": {
          "type": "integer",
          "example": 1
        },
        "default_site_id": {
          "type": "integer",
          "example": 1
        },
        "logo_id": {
          "type": "integer",
          "example": 1
        },
        "favicon_id": {
          "type": "integer",
          "example": 1
        },
        "delivery_token_expiration": {
          "type": "integer",
          "example": 1
        },
        "created_at": {
          "type": "string",
          "format": "date-time",
          "example": "2019-10-08T16:08:55.000-03:00"
        },
        "updated_at": {
          "type": "string",
          "format": "date-time",
          "example": "2019-10-08T16:08:55.000-03:00"
        }
      }
    }
  }
}
Click Save & Next, select all operators and click Next and Done.
Click Save & Next, select all operators and click Next and Done.
Within Setup, click on Contact to create the fields we'll need.
| Modyo ID | Text(255) (External ID) (Unique Case Insensitive) |
| Premium Customer | Checkbox |
Mark everything in Visible and save.
Then in Modyo Platform, select Customers and click Realms. Select your Realm and in Realm Settings click Custom Fields. Click New Custom Field and fill in the following fields:
| Field type | Checkbox |
| Field name | Premium Customer |
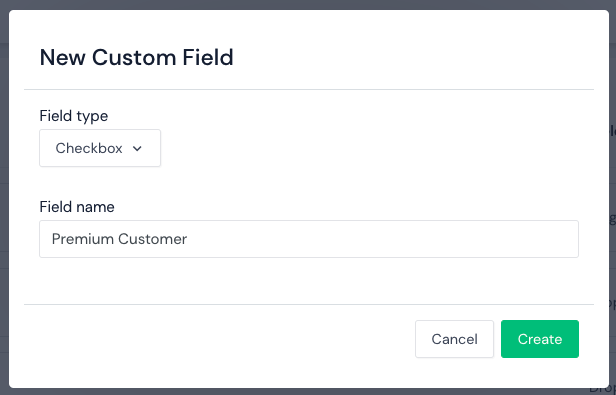
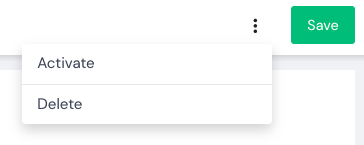
Click on Create, activate it in the 3 points and save.
# Step 8: Creating Flow
After the setup to connect Salesforce to Modyo is complete, the flow needs to be created to synchronize Salesforce users with Modyo.
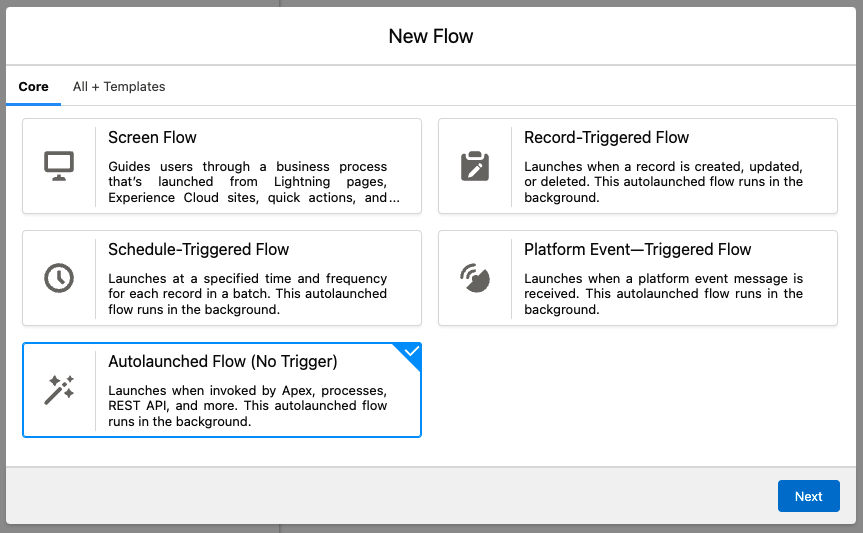
For this, go to Setup -> Flows and click New Flow. Select Autolaunched Flow, and then Freeform.
To get started, go to the Manager tab and create new resources.
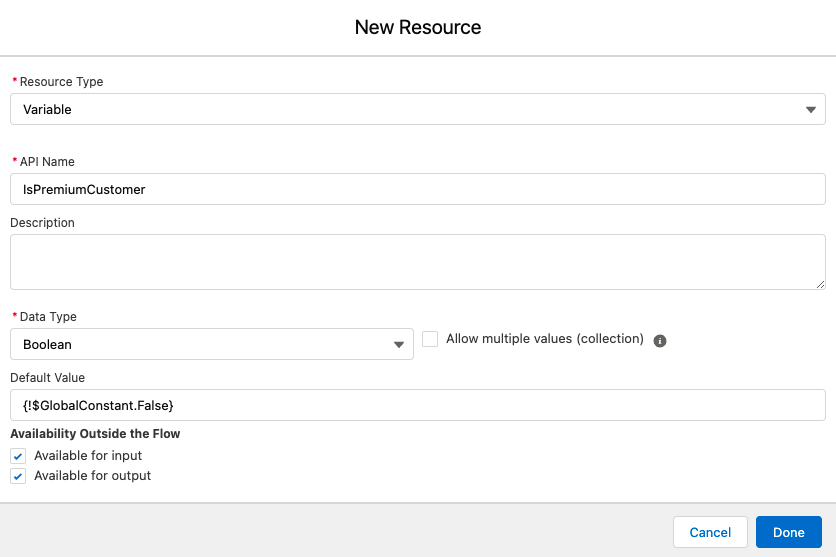
Creates a new variable named isPremiumCustomer of the Boolean Type and of default value {!$GlobalConstant.False}, enable the two fields below and click Done.
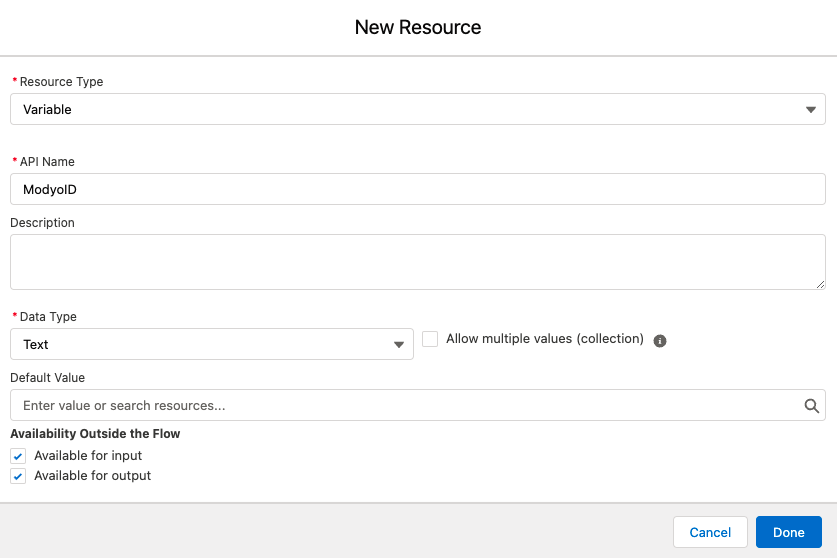
Creates a new variable ModyoID of type Text and, like the previous one, enables for input and Available for output.
Then create another variable called DynamicCustomField and unlike the previous ones, in Data Type select Apex-Defined. In Apex Class type ExternalService__DynamicModyo_UserCustomField, enable input and output, and click Done.
Repeat the same procedure but changing the name to DynamicUserInput and Apex Class by ExternalService__DynamicModyo_UserInput.
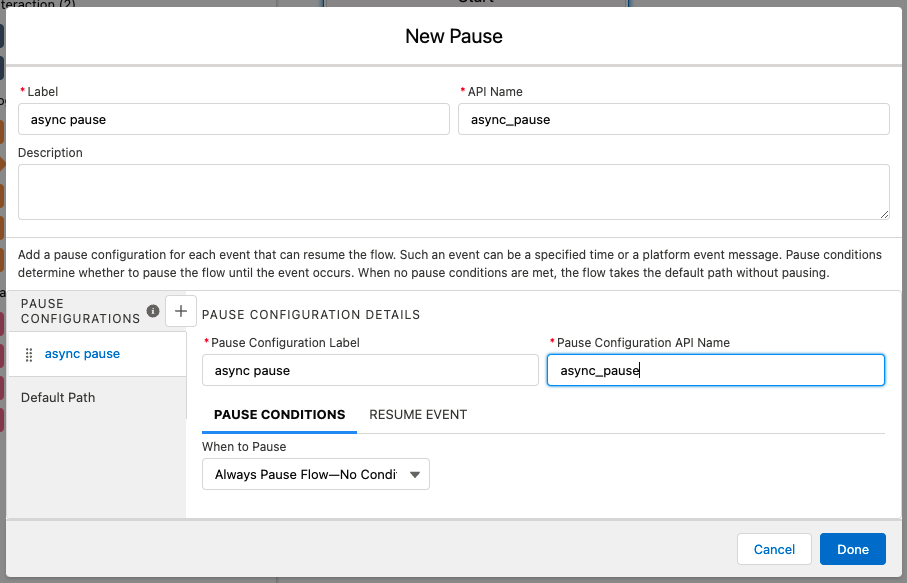
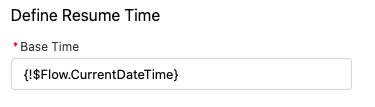
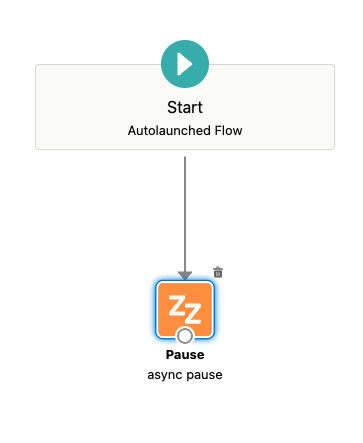
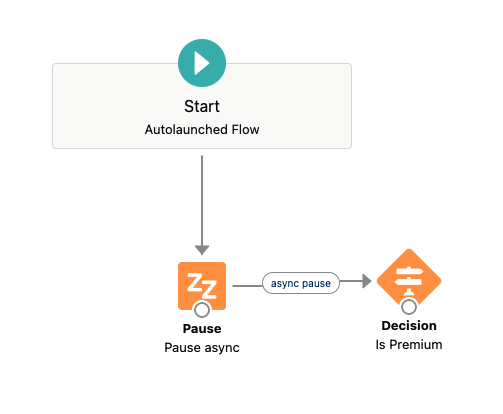
Once the Variables are created, return to the tab of Elements and add to the flow an Pause, named async pause and inResume event add {!$Flow.CurrentDateTime} in Base Time inside Define Resume Time.
Now the dots have to be joined.
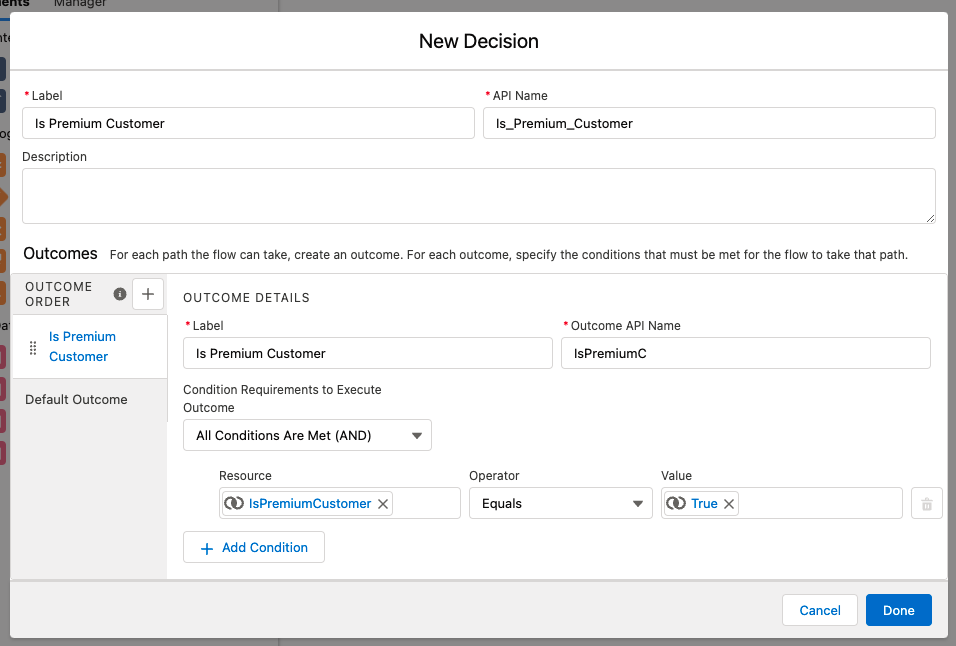
Add an Decision to the flow, named Is Premium Customer, and fill it with the following fields:
| Label | Is Premium Customer |
| API Name | Is_Premium_Customer |
| Label | Is Premium Customer |
| Outcome API Name | IsPremiumC |
| Condition Requirements to Execute Outcome | IsPremiumC |
| Outcome API Name | All Condition Are Met (AND) |
| Resource | {!IsPremiumCustomer} |
| Operator | Equals |
| Value | {!$GlobalConstant.True} |
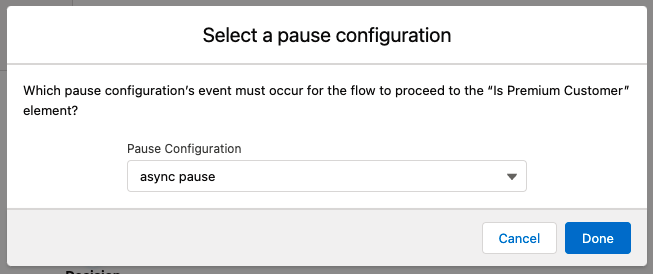
Then connect the dots by activating the pause.
And the result looks something like this:
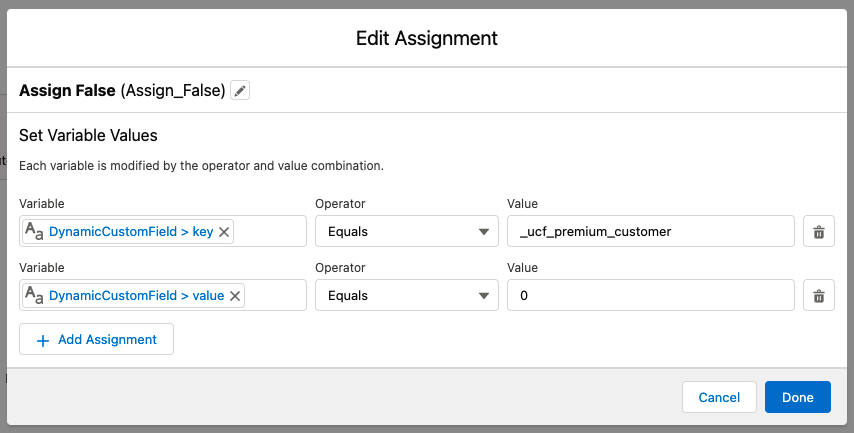
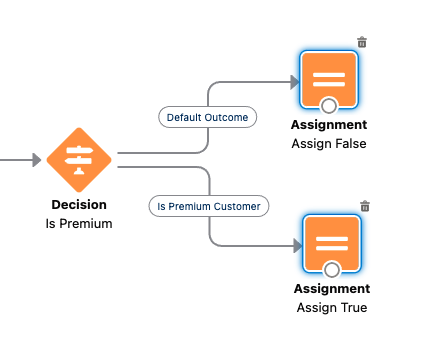
Now we are going to perform two Assignments depending on the Decision, one for Default Outcome and one for Is Premium Customer with the following attributes:
Default Outcome:

Is Premium Customer:
After creating the Assignments, they are connected as follows:
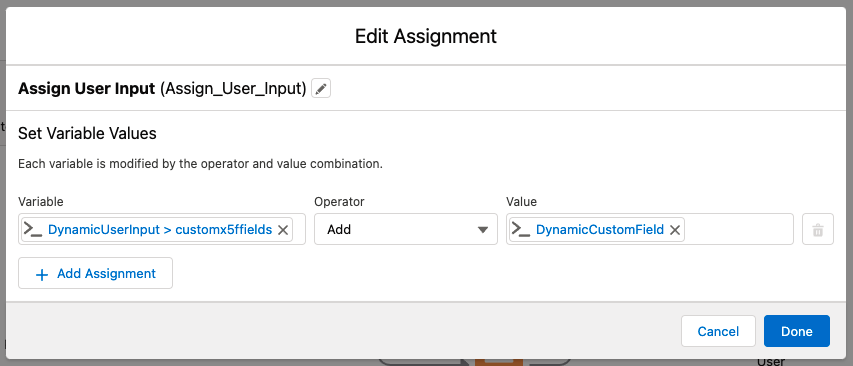
Now that the input is true or false, let's generate a new Assignment with the following fields:
| Variable | {!DynamicUserInput.customx5ffields} |
| Operator | Add |
| Value | {!DynamicCustomField} |
To end the flow, add a last item Interaction, specifically an Action named Update_Dynamic_User.
In the action finder, click PutUsersByUser_ID :
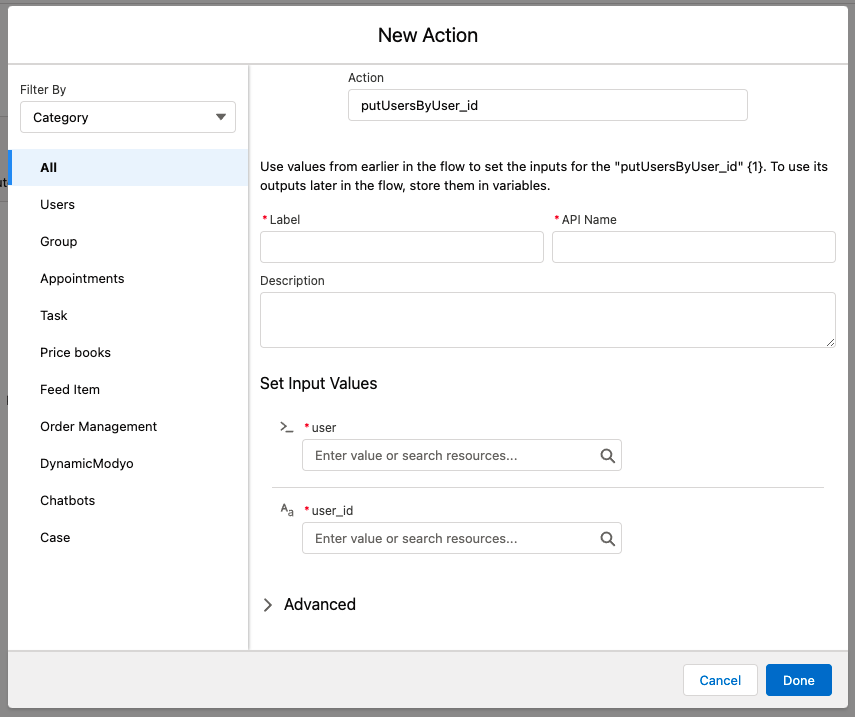
Complete the following information:
| Label | Uptdate Dynamic User |
| user | {!DynamicUserInput} |
| user_id | {!ModyoID} |
And connect all the dots so that the Flow looks like this:
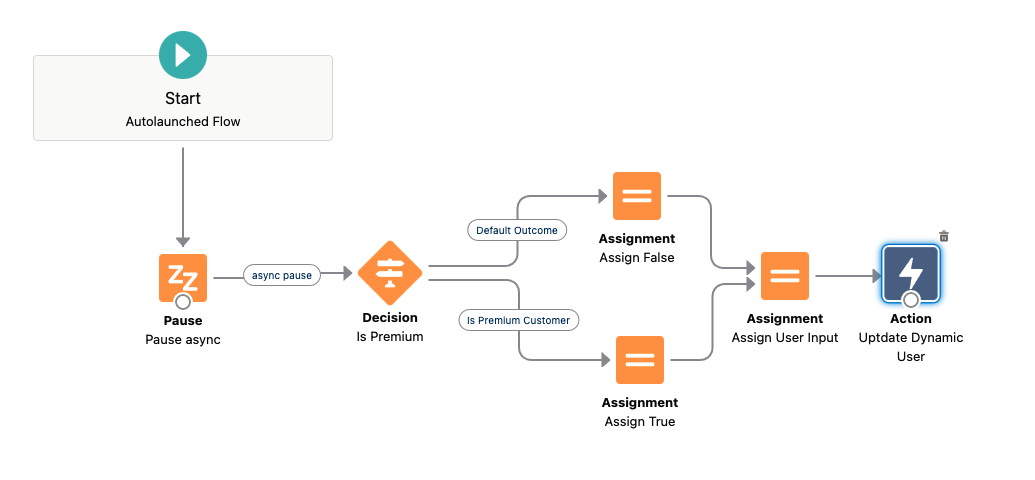
Finally, save and test that it is working correctly.
# Step 9: Creating Process
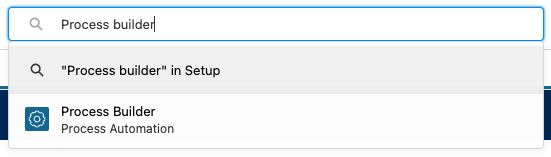
Now we need to search Process builder in the search engine,
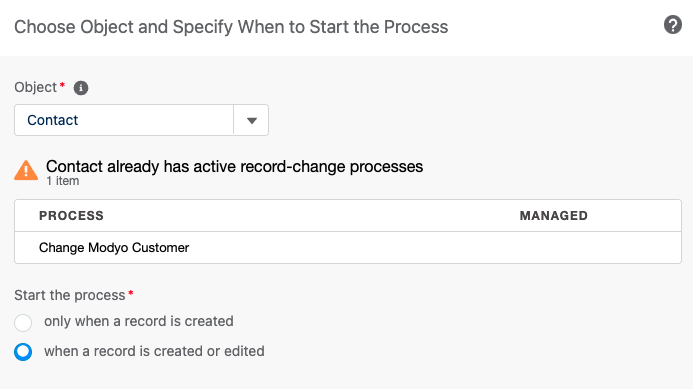
And generate a new one with the name Change Modyo Customer and in The process starts when select A record changes, which looks like this:
Then in Object click Add Object, add a Contact, select when a record is created or edited and click Save.
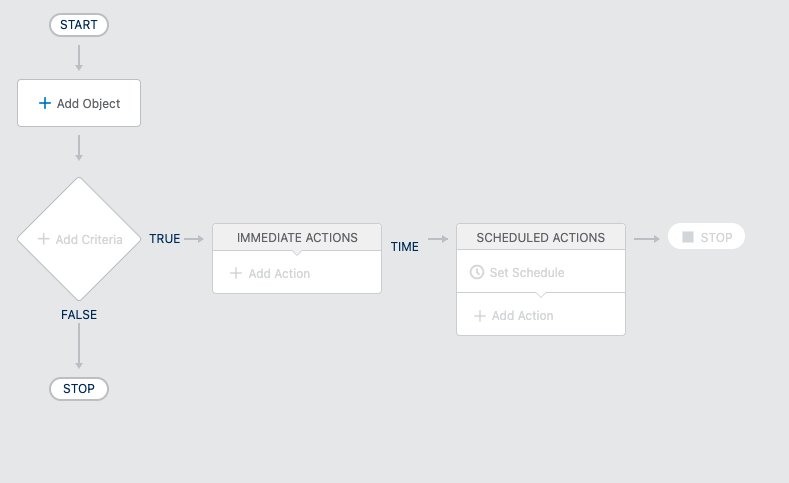
Then click on Add Criteria and fill in the following fields:
| Criteria Name | Customer Status Changed |
| Criteria for Executing Actions | Conditions are met |
| Conditions | All of the conditions are met (AND) |
In the table of Set Conditions
| Field | Operator | Type | Value |
| [Contact].Premium_Customer__c | Is changed | Boolean | True |
| [Contact].Modyo_ID__c | Is null | Boolean | False |
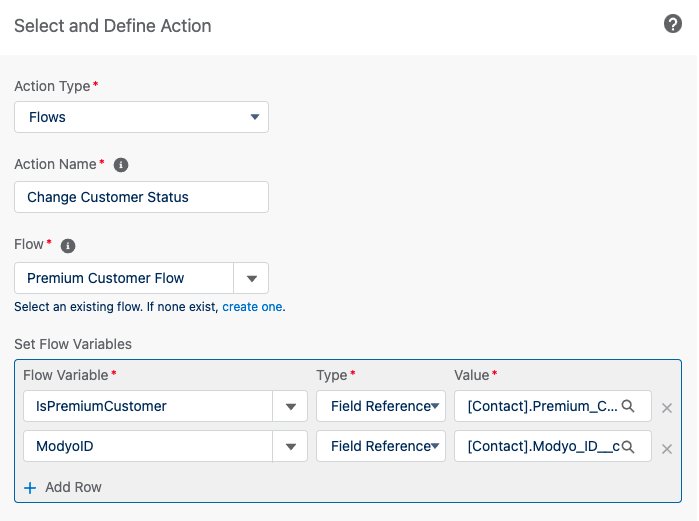
With this we ensure that the contact has Modyo ID, click Save and on IMMEDIATE ACTIONS click on Add Action with the following data:
| Action Type | Flows |
| Action Name | Change Customer Status |
| Flow | Premium Customer Flow |
In Set Flow Variables add two lines with the following:
| Flow Variable | Type | Value |
| IsPremiumCustomer | Field Reference | Premium Customer |
| ModyoID | Field Reference | Modyo ID |
Click on Activate.
# Conclusion
Congratulations! You have finished the tutorial, in order to test that everything is OK, we need to create a user by filling in the required fields (First Name, Last Name, Email and Modyo ID).
To find out the user ID in Modyo we can do it through the Customers API at the following {acount.url}/customers/{realm_uid}/users or on the Modyo platform, by clicking the user within Realms. The Modyo ID will be located as part of the URL and looks something like: 987eb795-9476-49f7-b511-efb5ba3f07de.